The MacBook and Important Features
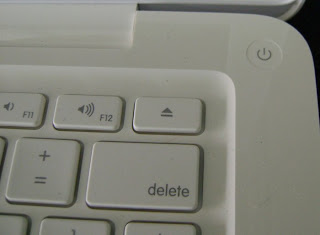
 The MacBook's power button is located on the top right side of the machine. Press the power button once to turn on the computer. It takes less than a minute for the screen to light up. Near the power button are the keys labeled F11 and F12. The will allow you to raise and lower the volume on the speakers from the keyboard. To the right of the F12 key is the eject button. If you load a CD or DVD into the machine, this button will eject the disc.
On the left edge of the computer are a series of ports to connect various pieces of equipment. Look at the left edge of the computer from left to right is the port to connect the power supply. Next is the port for an Internet Ethernet cable. This might be needed at home if you have DSL, cable, or FIOS Internet service and you do not have wireless Internet service. To the right of this port is the location to attach the projector cable into the MacBook. Next are two USB ports, one can be used to connect the Promethean Activeboard and one can be used for a mouse or other device. Finally, there is a small circular port for the speakers.
The Projector
The Epson PL 83+ is the projector we are using. It provides a very bright image. So far, it has been easy to use and set up. The projector will stay on the cart with the electrical plug and computer cable attached. In the morning, plug the white MacBook adapter into the Projector Adapter port. The blue projector cable will be plugged into the white projector adapter's wide end. The tiny end plugs into the MacBook.Next, press the power button once on the top of the projector to turn the bulb on. It takes less than a minute for the projector bulb to warm up and show a crisp, clear image. The Power light will flash while it warms up and then will be a steady green light. In front of the Power button is a sliding door. Use this door to temporarily "mute" the bulb. This is useful when you do not want to show the computer screen during class or during prep periods.
To turn the projector off, press the Power button once. You will see a message on the screen asking you to press the Power button a second time to confirm that you really want to turn off the projector's bulb.
The Speakers
The speakers for the system are the JBL Duet 2.0 speakers. They provide excellent sound for movies, guest speakers via computer, educational games, and Promethean's ActivInspire software. The volume can be controlled in two ways: via the knob on the front of the speaker and via the F11 and F12 function keys at the top of the keyboard near the computer's power button.If the volume is too low, make sure the F12 key is pressed until the computer is producing maximum volume. From there, you can use the silver knob on the speaker (to the left in the image) to make sure the speakers are also set to full volume.
The Mouse Track Pad
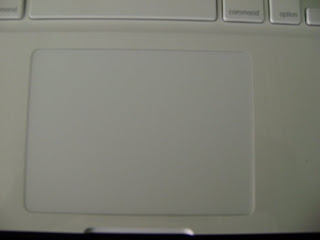
The MacBook has a mouse track pad below the keyboard. It will take a little time to get used to this feature. If you are uncomfortable with the track pad, you can use one of the mice from a computer in your class and plug it into the USB port on the left side of the computer.The entire rectangle is available to slide your finger. Wherever you slide your finger, you will see the mouse pointer move on the screen.
To "click the left mouse button", press the bottom the the rectangle. To "double click", tap the bottom of the track pad's rectangle twice. To "right click the mouse", hold down the control key on the keyboard and press the bottom of the track pad rectangle. It takes a little getting used to, but soon you will feel confident.
One interesting feature is the ability to "pinch" and "pull" the screen to zoom in and out. To zoom in, take your thumb and pointer finger, place them on the track pad surface and separate your fingers. To zoom out, place your thumb and pointer finger on the track pad spread out a bit and make a pinching motion on the track pad. I found this out the hard way. I got the screen to zoom in by mistake and didn't know what I did. Through experience with this feature on the iTouch, I decided to try the pinch and pull motions and they worked. The track pad is what is known as "multi touch" which allows this new motion.


No comments:
Post a Comment